Christopher Kimball’s Milk Street Television
Parisian Sweets
9/10/2024 | 26m 49sVideo has Closed Captions
Christopher Kimball heads to Paris to learn show-stopping French desserts.
Christopher Kimball heads back to Paris to satiate his sweet tooth with two show-stopping recipes, one of which has Chris the most excited he's ever been about a dessert! First up is Parisian Flan, where we harness the science of cornstarch to make a pastry cream filling with a double dose of vanilla. Then, Rose Hattabaugh makes Babas Au Rum, a French dessert flavored with candied orange and rum.
Christopher Kimball’s Milk Street Television is presented by your local public television station.
Distributed nationally by American Public Television
Christopher Kimball’s Milk Street Television
Parisian Sweets
9/10/2024 | 26m 49sVideo has Closed Captions
Christopher Kimball heads back to Paris to satiate his sweet tooth with two show-stopping recipes, one of which has Chris the most excited he's ever been about a dessert! First up is Parisian Flan, where we harness the science of cornstarch to make a pastry cream filling with a double dose of vanilla. Then, Rose Hattabaugh makes Babas Au Rum, a French dessert flavored with candied orange and rum.
How to Watch Christopher Kimball’s Milk Street Television
Christopher Kimball’s Milk Street Television is available to stream on pbs.org and the free PBS App, available on iPhone, Apple TV, Android TV, Android smartphones, Amazon Fire TV, Amazon Fire Tablet, Roku, Samsung Smart TV, and Vizio.
Providing Support for PBS.org
Learn Moreabout PBS online sponsorship♪ ♪ ♪ ♪ - You know, if you're a tourist in Paris, there are plenty of things that are hidden you probably won't come across.
the Jardin des Plantes in the 5th with the world's coolest natural history museum.
Dehillerin, the old cookware store that has a portrait of Julia Child on the wall.
Deyrolle, which has a taxidermy display, which is incredible on the second floor, or the Poilâne bakery in the 6th.
You can go downstairs and look at their 14th century oven.
Now, when I was recently in Paris, I found two desserts that were slightly different, slightly hidden, something I was not really aware of.
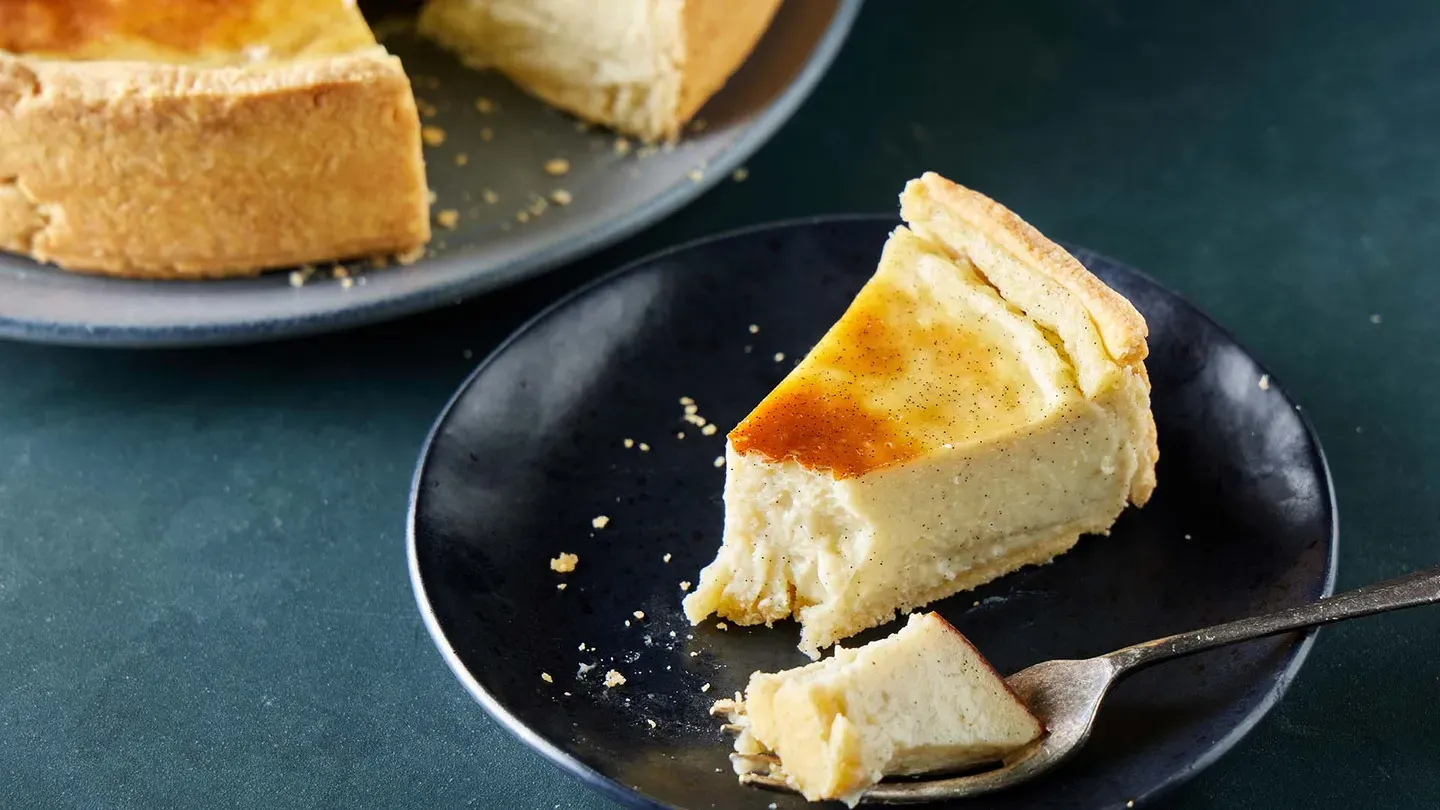
The first is Paris flan.
It's essentially a pastry cream baked in a round crust about four inches high.
Kids on their way home from school might stop at a bakery and get a slice.
Absolutely terrific.
And then the second recipe, oddly enough, is babas au rhum.
Now, I don't like this dessert.
It's too much booze, it's too heavy.
So I was at a restaurant called Le Baratin in the 20th.
They brought what looks like a muffin split in half, the baba, and they gave me a bottle of rum and a big bowl of whipped cream.
It was really terrific.
So, let's go into the kitchen here at Milk Street and figure out how to make two hidden Parisian desserts.
One is Paris flan and the other is babas au rhum.
- Funding for this series was provided by the following: - MOWI salmon comes ready to cook, ready to grill, ready to season, or pre-seasoned and ready to eat.
An assortment of flavors for an assortment of people.
MOWI Salmon.
- We pass down traditions here.
We create and connect.
We enjoy special moments.
Some simple, some grand.
The heart of your home is the kitchen.
The heart of your kitchen is The Galley.
- On this trip to Paris, I set out to meet pastry chefs who are breathing new life into old classics.
One of them was Sébastien Bras.
His father invented a dish called coulant au chocolat, or the original molten chocolate cake.
Now, it's a dessert that is definitely for high-end pastry chefs, but it's really mesmerizing to watch.
- (speaking French): ♪ ♪ - Next, I went to Amazonia for my lesson on Paris flan.
- Dessert, it's about sharing.
When I have a tart in front of me, it remembers me when I was younger with my family, buying a tart in a pastry shop for the whole family, sharing the tart on Sunday for after lunch, for dessert, you know?
My name is Stéphane Jimenez.
I am from Paris.
The flan, it's actually a pastry cream.
Most of the time, it's perfumed with vanilla, cooked on a pot, and after, when it's boiling, you cook it again in the oven.
So it's more about cooking the outside than the inside.
So, to make it, it's very easy.
We mix the flour and the butter.
And when it's crumbled texture, you add the rest of the ingredients.
You mix it a little bit, and then after you remove it from the mixer and put it on the table and do the fraisage.
The fraisage is to press on the dough with the palm of the hand, just like this.
Finishing by hand, and put it in the fridge after for one hour.
When you roll it, it's perfect.
And you can use it right away to put it in the mold.
We bring it to a boil, the milk, the cream, and the vanilla beans together.
At the same time, We mix the eggs with the sugar.
When the milk and the cream are boiling, you add one-third of the liquid into the eggs and sugar and cornstarch, mix it together, and then bring it back to the pot.
Never stop mixing, and cook it until it's boiling.
Make sure it's very thick before you pour it into the mold.
When I put the cream into the mold, I put it back in the fridge for ten, 15 minutes, so I have a crust on top of my cream.
♪ ♪ Et voila, the flan is ready.
That's the biggest thing I can recommend to people when they make pastry.
Just respect the recipe, and normally, it comes... perfect.
(chuckles) ♪ ♪ - You know, once in a while, I've been accused of making fun of French cooking.
That being said, I was in Paris recently and had phenomenal food, and I met a guy, Stéphane Jimenez.
He introduced me to a classic recipe.
You think pastry cream, you think heavy, right?
Well, it's actually really light.
(chuckling): And I don't say that, like, smiling, because it's a joke.
It really is light.
It's absolutely, phenomenally delicious.
I think it's my number-one dessert of all time.
But it starts with a pastry crust that's a little bit on the lean side.
Now, if you have two cups of flour, normally with an American pie pastry, you might use, I don't know, 14 to 16 tablespoons of butter.
But we're going to use eight.
And first we're going to start with just a tablespoon of sugar and some salt.
The next thing we're going to do, and I've said this over 40 years of doing this, is we're not going to cut the butter in until it has pea-sized pieces.
By the way, I just found out who the person was who came up with that ridiculous concept.
It's The Boston Cooking-School Cook Book.
This is the 1941 edition.
And Fannie Farmer, she says, "Until shortening is evenly mixed in bits no larger than peas."
So I get to blame Fannie Farmer.
But the French cut their fat into the flour.
They do that because it coats the flour.
There's less gluten production, and it's much easier to roll out, and you get a more tender pastry.
It's not as flaky, but it's more tender.
So we're gonna cut this in until... (whirring) ...it looks like coarse sand and it turns a slightly yellowish color.
I do not want to see pea-sized pieces of butter in here.
(whirring) So now we need liquid, two egg yolks, and a quarter cup of water.
So we're adding a little bit more fat, but it's still fairly lean.
(whirring) Okay, so I'm going to put it on a piece of plastic.
Now, at Amazonia, they did a fraisage actually, which is a classic French method.
It means you push the dough with the heel of your hand away from you, bring it back, do it two or three times and you get a nice texture and a little bit of layering.
But this way, you shape the dough.
Use the plastic.
If you're not good at working with dough, I'd definitely do this the day before.
Let this sit in the fridge overnight.
If you are pretty good at working with dough, just give it an hour or two in the fridge, and then we'll come back and we'll start to roll it out.
So while I was in the kitchen in Amazonia with Stéphane, they use pastry rings very often in Paris-- okay, there's no bottom.
And when he fitted the dough, it's sitting on a double mesh, which means when you put it into the oven, all that heat can go up into the bottom.
This was really a great technique.
And you can find this if you want, but obviously most people do not have that.
So we decided to use a springform pan.
And this actually works as well, you will get a thoroughly cooked bottom.
So here we have the dough.
You want to take this out at least ten minutes before you roll it out.
I'm going to beat it up a little first.
What I like to do when I'm dealing with a circle is I want to start with my left hand here, and then bring this around a quarter turn, okay?
And then turn the dough a quarter turn like that.
So you get out to about ten inches.
So you can start from the center, Find places where you need to expand it.
You always want to leave a little extra room.
So if a recipe-- this recipe says a 13-inch round, I'd probably go to 14, just so you have a little extra.
So what does that look like?
Well, let's take a look.
That's looking pretty good.
And this is a nice lean dough, as I said, which means it's easier to work with.
The more fat, the stickier things are.
So... okay.
Put that down in.
So now we're going to gently press it to the side.
You want to press down into the corners.
Take your time.
It looks a little messy at first.
Don't panic, it'll be okay.
So now we just want two inches.
So we're just going to make little marks or you can do it by eye if you like.
Okay, so now we have those little marks.
We can cut the dough.
So now we're going to deal with the issue of pre-baking.
We're not going to pre-bake this.
The way to avoid pre-baking, unless you have that special equipment, is you need to freeze something like this.
So you can put it in the freezer for 30 minutes or you can refrigerate it, then put it in the freezer.
But it needs at least 30 minutes in the freezer.
But that freezing is going to reduce the amount of contraction when it bakes to give it time to set up.
Let me give you a simple formula you can remember so you can make pastry cream anytime you want, if you want to.
It's three cups of dairy-- let's say two cups of milk, one cup of heavy cream-- a half cup of sugar, a quarter cup of cornstarch, and three eggs.
We're going to double that.
So we're going to use a full four cups quart of milk.
And we're going to use two cups of heavy cream.
And we're going to heat this up and bring it to a simmer.
So we have a full cup of sugar, half a cup of cornstarch.
This is vanilla paste.
Now, this recipe uses vanilla extract at the end.
You always want to add vanilla extract at the end with a liquid like a custard, but we like to use either a powder or a paste.
They're a nice, strong flavor.
You're going to use a tablespoon of either-or.
Here, we're going to put this in at the beginning, and then we're going to reserve the tablespoon of vanilla extract to the end.
If you don't have powder or the paste, that's fine.
just double the extract to two tablespoons and put it in at the end.
We're also going to add the three whole eggs and the two yolks to this mixture.
Now, if we were just going to put this directly into six cups of really hot liquid, you'd have a chance of maybe cooking the eggs, which you don't want to do.
We're going to add about a third of it slowly to the egg-sugar-cornstarch mixer and whisk it in to temper it.
This also helps to dissolve the sugar in the cornstarch.
So you want this on a medium high.
You don't want it fully on high.
You want to stir, you want to whisk.
I would do it gently.
Now, once you start to see it bubble, give it about 30 seconds more, again, gently whisking.
And that's it.
You don't want this-- this is about 181, 185 right now.
You don't want it to go to 200 or higher.
Okay, we're good.
What you really want to do is put this through a fine mesh strainer.
Now, here's a little trick a pastry chef taught me, which is to use a ladle.
Because obviously, the bottom of a ladle is curved, just like the inside of this mesh, and it does a great job pressing something through a mesh.
And we're going to add that vanilla extract.
So here is the frozen crust.
By the way, if you're not getting excited at home watching this, there's something wrong with you.
You should be really excited about this.
Maybe I just like custards as a kid or something, I don't know.
And I'm just going to take an offset spatula and smooth it out.
So you'll notice that there is a little bit of room between the filling and the top, which is what you want, because it will rise a little.
Okay.
So now this goes back into the fridge for about half an hour again.
So the surface starts to develop a little bit of skin.
So when we bake this off, it's not going to souffle up and rise.
There is a little skin on the top here, which is going to prevent the pastry cream from puffing way up over the pie pastry on the side.
So we get asked this question all the time.
Does it matter-- that does the baking time change-- if you have a dark pan versus a light pan?
So if you have a dark springform pan, we would bake this for ten minutes at 400 degrees.
If you have a light-colored pan like this one, we're going to bake it 20 minutes at 400 degrees.
Then since we have a light pan, we'll finish it off at 350 for about 35 minutes or so.
If we'd had a darker pan, we'd let that go 40, 45.
So, it does matter.
And we have different baking instructions based on the pan.
So, I just have to ask, are you excited?
Because I'm excited.
That comes off nicely.
Here's a trick Stéphane taught me, which I thought was really interesting.
Like, how do you cut when you have a crust and then you also have something delicate?
Well, he takes a serrated knife, cuts across like that, so you get the crust started.
So we're going to cut down, and just through the skin a little bit like that.
And then, go to our backup.
Now, get down on your knees... (chuckles) and praise Stéphane Jimenez and all French pastry chefs, because this is as heavenly as it's going to get on this earth.
It almost just melts in your mouth, so this makes absolutely no sense to me.
I know, pastry cream, but it's very, very light, has a wonderful texture.
Maybe it's a function of cooking it on the stovetop, thickening it, and then cooling it down and then putting it back in the oven.
Maybe that double cooking is what does it, but it's a very different texture than the pastry cream you get from just top of the stove.
This is how life should be lived.
A Paris flan pastry cream in a crust.
Sounds basic, but it is heavenly.
♪ ♪ - Babas au rhum are small, individual brioche-like cakes that are often heavily soaked in a really boozy rum syrup.
At Restaurant Astier in Paris, we had a lighter, fresher version, and that's what we brought back here at Milk Street to try.
So first, we're going to make the syrup.
We have added orange to our syrup, which gives it a nice citrusy flavor, but also kind of takes down a little bit of that alcoholic bite.
So I'm going to take four good-sized zest strips.
Those are going to go in my saucepan.
And with any syrup, we're going to do sugar-- this is about a cup-- and some water.
And I'm also going to add some of the juice from the orange.
Orange and rum are a really classic pairing, so it works really well for this.
And that's about three tablespoons.
We're going to cook this until the sugar dissolves and we've reduced it down to about one cup.
So now that the sugar is dissolved and this is reduced down, I'm going to take out our orange peel and chop that up and set it aside.
So this is kind of candied now, because it has the sugar syrup on it.
I'm going to chop it in small pieces because it's going into the dough and we want it to really distribute nicely.
So put that aside, and then I'm going to stir in my rum.
So we're just going to let this cool down and set it aside.
So now we're going to make our little individual cakes.
This dough is very similar to a brioche, and you might be a little intimidated by that, but it's very easy to make at home.
So I'm going to show you how to do that.
So I've got some eggs and egg yolks here.
I'm going to add some water.
I'm going to whisk this together...
Okay, and set that aside.
In here, I've got our flour, some sugar... yeast... and salt.
So I'm just going to mix this to combine that.
(whirring) Then I'm going to slowly add our eggs.
(whirring) Then we're going to beat this until we have kind of a rough dough.
So I've let that go for about two minutes.
Now we're going to add our butter, and that's going to smooth it out, and then we're going to let it go a little bit longer.
This is an enriched dough, so butter is something you would often add butter, oil, something like that.
But you want to add it slowly and let each piece kind of incorporate before you add the next.
So you really want to make sure you're using room temperature butter here.
Cold butter is going to seize up in this.
It's not going to incorporate well, so it has to be room temperature.
Now that all of our butter is incorporated, we're going to let this go for about seven to nine minutes because we really want to build some of that gluten, because these are really delicate cakes, but you want to make sure there's enough gluten to hold them when they're baked.
Okay, so we've let this go for about seven or eight minutes.
Now, there's a couple of things you want to look for.
You want your dough to be shiny.
You can see it's kind of started to clear the edge of the bowl a little bit?
And when I pick it up, it's going to leave a rope that's going to hold together when I pick this up.
If it breaks immediately, then you're not there yet.
So now that I know that my dough is where I want it, I'm going to add our candied orange zest... and run the mixer for about a minute, just to incorporate all of that.
This smells amazing, by the way.
It smells like Christmas; the bread, the orange, all of it.
This would be a great little holiday treat, I will say.
Okay, I think we're good.
So now, what I'm going to do is clean the dough off of my dough hook, get rid of that, and then I'm going to take the bowl off the mixer, make sure everything is in the center.
I'm going to cover the bowl with plastic wrap and let it sit at room temperature to rise, so it will double in volume for an hour to an hour and a half.
♪ ♪ So this dough has been rising for about an hour and a half.
We're almost ready to put them in the mold.
I want to show you how to butter these.
This is two tablespoons of butter.
It seems like a lot of butter, but you want to make sure there is plenty in these so that you can pull them right out and they don't stick.
This makes eight cakes.
So what I'm doing is I'm only going to butter the four cups that are on the outside of the tin.
So that leaves the middle cups empty, but gives some air circulation, so they bake nice and evenly.
So that's why we're doing it that way.
Turn it around.
Four... And then we're going to put them in and they have to rise one more time.
We'll get those ready for that.
All right, I am going to fill these about two thirds of the way full.
This dough is very stretchy and very sticky.
That is how it's supposed to be because that's what makes these so fluffy and light.
So what you want to do here is use a big spoon, and even a smaller spoon to help take some of that off.
So... use the other spoon.
Or honestly, if you want to oil or butter your hand, which is what I'm going to do, you can actually use your hand.
So it is a little bit hard to gauge how much is in each one.
So you might have to go back and take some out of one, put in another.
I can see these are a little overfilled, so I'm going to do that.
Don't be afraid to get your hands dirty.
So you can see that was a little sticky.
It's kind of messy, but that's why you need so much butter.
But they're going to be delicious, trust me.
So now we're going to spray some plastic wrap on one side, cover these, and let them rise for 35 to 40 minutes until they double in size.
So these have been rising for about 40 minutes.
So these are gonna go in a 350-degree oven with the rack in the middle position for about 16 to 18 minutes.
All right, these are ready.
I wish you could smell these, it smells like a bakery in here.
This never gets old.
Look at how beautiful this is, it's so pretty.
So we're gonna let these cool for about five minutes, and then I'm going to take them out, because I want to brush them with some of our syrup.
These have cooled for about five minutes.
I'm going to put them on our rack... And then, this is the thing that really kind of makes them look-- I don't know if I want to say professional-- but something you might get at a bakery, is when you brush this syrup on and they get so shiny and beautiful.
Just a really nice finishing touch.
So we're going to take this rum syrup, and we're going to brush each cake all over.
And then we're going to let them sit on the rack for another five or ten minutes if you want to serve them warm.
Or you can let them sit for a few hours and then put them in an airtight container, and then you could reheat them wrapped in a little bit of foil at 350 for about eight to ten minutes if you want to do it that way.
Okay, and now we'll make our whipped cream.
So when you're ready to serve these, you want to make your whipped cream.
So I've got a cup of heavy cream.
And I'm going to sweeten that with two tablespoons of our rum syrup.
So just enough sweetness and a little bit of rum is really nice in this.
And I'm just going to whip this just for about two to three minutes.
(whirring) Okay, so that looks about right.
You want your cream to be as soft and billowy as your little cakes.
You can serve these warm or at room temperature.
I kind of like them warm.
And then I'm going to take about a tablespoon of our syrup and drizzle it on each side.
So that's going to soak in really nicely, but it's not going to be really soggy.
We're going to add a little bit of our whipped cream, and there you have it.
A beautiful, classic dessert.
Mm.
That syrup, it's got a nice rum flavor to it, but it's not overpowering this cake.
The cake is soft.
A little bit of orange zest in there.
Delicious.
This is another show-stopping Parisian dessert.
You can get this recipe and all the recipes from this season at MilkStreetTV.com.
- Recipes and episodes from this season of Milk Street are available at MilkStreetTV.com, along with shopping lists, printer-ready recipes, and step-by-step videos.
Access our content anytime to change the way you cook.
- The new Milk Street Cookbook is now available and includes every recipe from our TV show.
From cacio e pepe and skillet spanakopita, to Brazilian-style carrot cake and Thai coconut soup, the Milk Street Cookbook offers bolder, fresher, simpler recipes.
Order your copy of the Milk Street Cookbook for $27, 40% less than the cover price.
Call 855-MILK-177 or order online.
- Funding for this series was provided by the following: - MOWI salmon comes ready to cook, ready to grill, ready to season, or pre-seasoned and ready to eat.
In an assortment of flavors for an assortment of people.
MOWI Salmon.
- We pass down traditions here.
We create and connect.
We enjoy special moments.
Some simple, some grand.
The heart of your home is the kitchen.
The heart of your kitchen is The Galley.
♪ ♪ ♪ ♪


Christopher Kimball’s Milk Street Television is presented by your local public television station.
Distributed nationally by American Public Television